Backyard Nature Fun activities are quick-and-simple ways to explore nature in your own backyard.
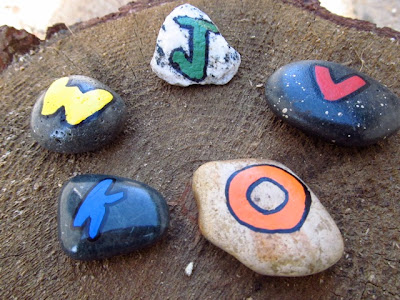
Long before The Little Explorer had his run-in with that rock in Yosemite, The Big Explorer and I were hard at work on a set of alphabet rocks for him for Christmas. He’s 3 ½ and all about rocks and letters, so what could be more perfect?
Inspired by this tutorial, we gathered a few essentials:
- Acrylic paints & a paintbrush
- A black sharpie
- Acrylic sealer
- Rocks (we chose to use our own, but you can buy rocks in most craft stores)
The Big Explorer helped me decide which letters should be painted which color (we chose five different colors), and of course, which rocks to use from our enormous collection.
It was this choosing of the rocks that was the most special. Recalling our many adventures and the treasures the boys had collected along the way. One granite rock from the trail to Yosemite Falls. Another from one of our countless neighborhood walks. And another cool yellow one we found on the beach during our first camping trip.
I did the painting. An uppercase letter on one side of the rock; its lowercase counterpart on the other. After the paint dried, I outlined each letter with a black sharpie, then sprayed the set with an acrylic sealer to assure the paint won’t chip.
Here’s hoping The Little Explorer is as excited with his gift as The Big Explorer and I were in creating it.
Take-Home Tips
- Smooth, flat rocks work best. We used a few granite rocks, but the smoother ones were much easier to work with.
- Allow enough time for the paint to dry in between each step. I got a little too eager to spray the sealer on before the sharpie had dried completely & had to re-do a few letters.
- Look for a variety of rock colors. I love that our collection includes white, black, yellow, gray & granite.
Happy Exploring!


