Okay my cold weather area fans – this one’s for you! Day 9 of 31 Days of Backyard Nature Fun requires freezing temperatures, preferably the kind outdoors.
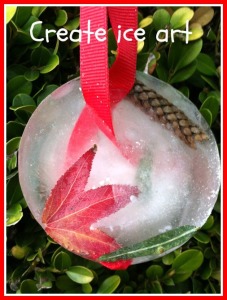
Besides cold weather (or a freezer), to create ice art you’ll need some bits of nature (leaves, berries, seeds, acorns, etc), a plastic plate, ice cube tray or other baking molds, and ribbon or string.
Day 9: Create ice art.
Creating ice art is pretty simple, leaving the creativity up to you. To make your own:
- Head outside for a nature walk. Gather items for your ice art (Our one rule when picking items was that they had to be things already on the ground.)
- Place your nature bits in the molds.
- Add water. Leave some room at the top of the mold to allow for the water to expand as it freezes. It’s best if this step is done wherever you plan to freeze your work as moving it once you add water may disturb the design.
- Place ribbon in the water. Make sure both ends are in the water to create a loop.
- Let your artwork freeze. If temperatures don’t get below 32°F outside, use your freezer instead.
- Remove the ice art from the molds. Run under warm water to loosen if needed.
- Hang ’em up or place them in the snow & enjoy!
For a little extra bling, try adding a drop or two of food coloring. And instead of bits of nature, why not make ice art for the birds using fruit slices or birdseed? As your ice melts, some of these goodies will become food for your backyard birds!
Just joining us? Catch up on what we’re up to at 31 Days of Backyard Nature Fun.


I hope you'll share – I'd love to see how they turn out!
We've done this several times and it's always a big hit. I think this year we'll make the balloon types, too. If I ever remember to get balloons, that is.
Thanks Kelly! Although only one is pictured here, we made several more – each with different natural elements. Such fun!
this is such a great idea! i love how you combined natural and fabric materials together for a soft and hard contrast of textures!!